Powered by Blogger.

room tour! - Avery Huia

Sunday, 20 March 2016

hellooooo!

I hope you are having a lovely day/evening! I am so sorry about the lack of posts recently, I have been sick, and was off school for a week and I have had lots of school work and after school activities as well, but now I have a post that lots of you have asked me for - room tour yay!

I've been wanting to post an updated room tour for a while now, I've had quite a few changes in my room since my last room tour post. The main colours in my room are light blue, black and white. My room has lots of geometric features in it too, like my duvet, curtains and wardrobe door! I hope you enjoy this post and get some inspiration for your room!


Here is part of my desk and bed area, I love this part of my room and I have recently redone my desk area and I've added a grid hanging mood board which I have decorated with lots of polaroids and  pretty photos and quotes. 


this is above my wire mood board, and it is a hanging shelf which I store things on in pretty storage things like the grid boxes and copper bags. I keep my pens and pencils in the containers on the top shelf, and I keep them organised in hot and cold colours.  I got the boxes from K-mart and the copper bags from The Warehouse. 


this is by my bed looking over to my desk, as I said before, this is my favourite part of my room! my bed linen and the pillow in the middle are from freedom, the big pillows at the back are ones that my mum made, and she also made the small one at the front!


This is my bedside area, and I keep my moodpboard that I made in a previous DIY (here) , my artificial plant, my light from Kmart, and my highlight of the day book from Kikki.K! I really love this book, I think it is really beneficial and it is so much fun looking back on the days of the past few years! It is over a three year span and I have been doing it for just over a year!


this is opposite my bed, and these are my shelves from Kmart. I love them so much because they are really easy to move and they look so cool! I keep my books, polaroid, plants and lots of decorative things on them, and on top is a moodboard that my mum made. 
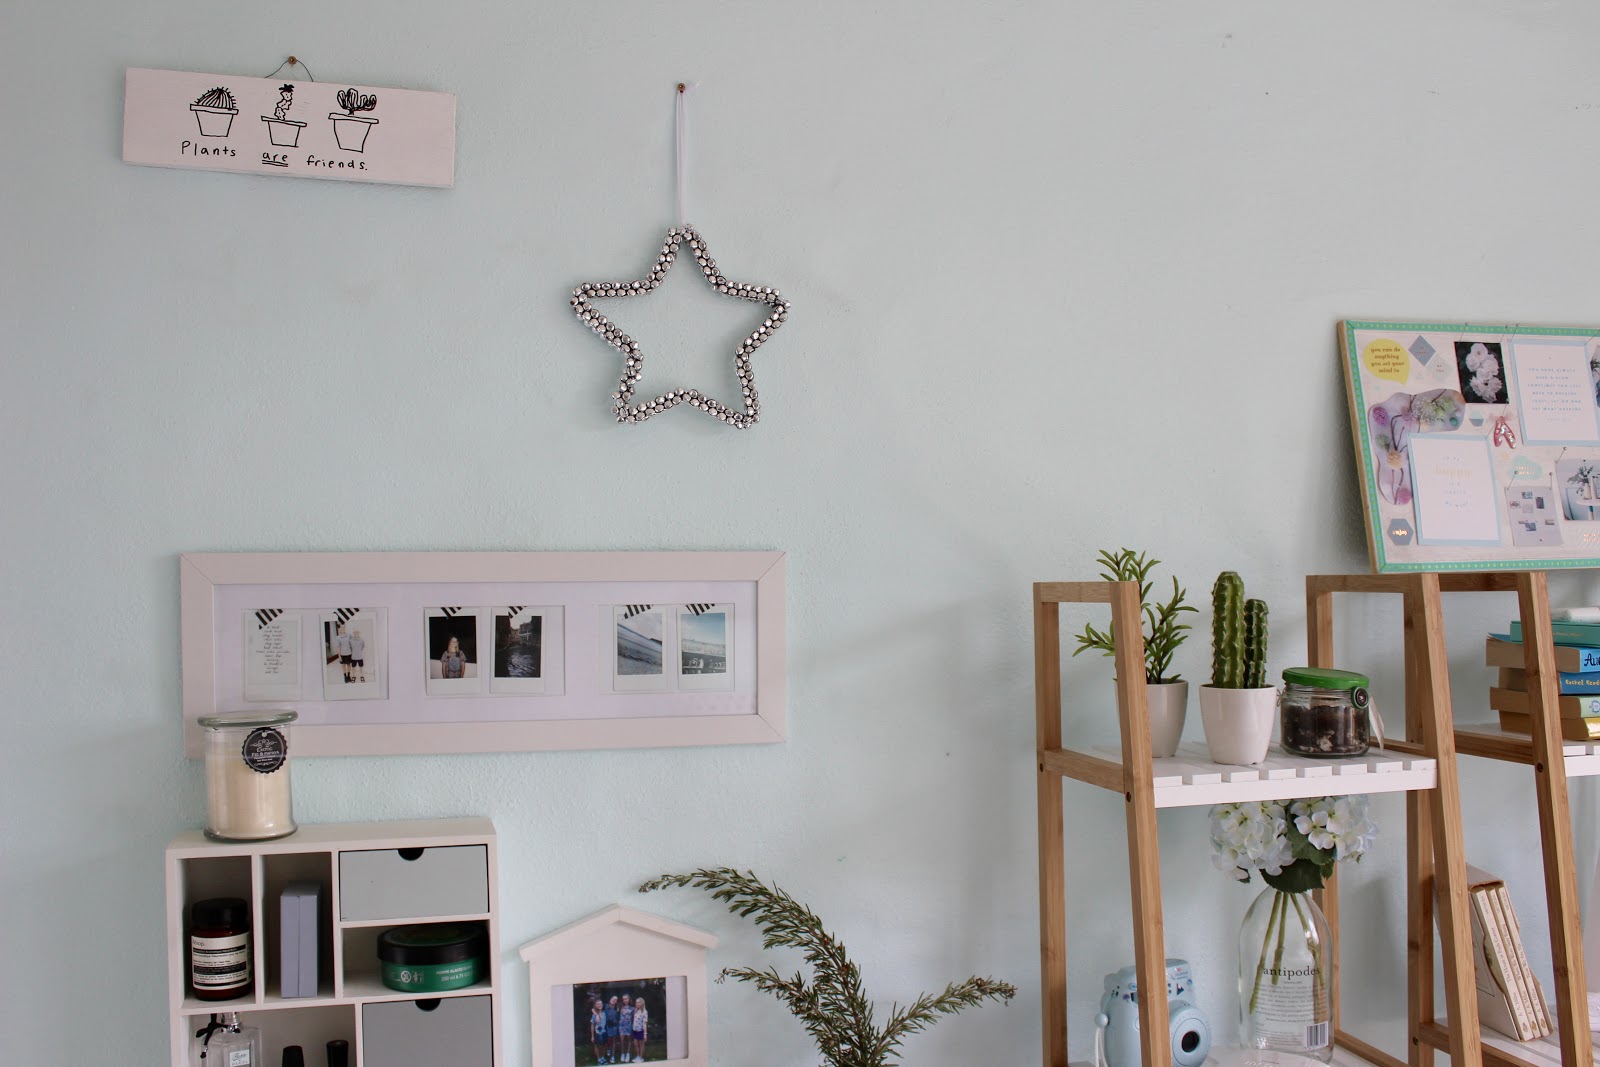

this is another shot of what is opposite of my bed, and next to the shelves are my drawers and on the top I keep a plant of whatever is growing in my garden, some photos and a storage thing with a candle on top.  Above on the wall are some photos and my plants are friends DIY and the star from my christmas decoration post!

I hope you enjoyed this and got some inspiration from it, if you have any questions about where I got anything, please feel free to add a comment, and I'll get back to you as soon as I can! 

love from avery huia x


Pin ThisShare on Tumblr

free phone wallpapers! - Avery Huia

Saturday, 9 January 2016

helloooooo!!!


so today I have a super duper exciting post, and I will be sharing with you three phone wallpapers that I have made and designed myself! please note that these are for personal use only! To download these, simple tap and hold (ios device) or right click (desktop)

1 -hello
I really like this one and the different sizes ect. I think this is really nice and basic and looks good when I use it as my phone's background!


2 - smiley sunshine
I thought this one was super cute and happy. When this one is my wallpaper, I feel really motivated and positive!


3 - love what you do 
I love this quote so much and I added some cute scalloping around the top and bottom! I like how this one has a black background, and I don't usually have black backgrounds, but this one changed my mind! 


I hope you like these wallpapers! I am definitely going to be doing more things like this in the future so hopefully you like them! Make sure to follow me on instagram for sneak peaks of upcoming posts and so you can suggest posts that you want to see - @averyhuiasblog x

love from avery huia x 

email - averyhuiasblog@gmail.com

Pin ThisShare on Tumblr

my new look - avery huia

Sunday, 13 December 2015

helloooo, and surprise!

Incase you haven't noticed, I have a new blog banner, made with help from the lovely Rose, from Logic Design. I have twelve new headers, one new colour for each month! Rose has done such an amazing job, and everything has come out amazingly, and so unique. She also helped me put together some stunning business cards, I love these so much, they are so pretty!

I have also changed my title to 'Avery Huia' instead of 'Avery Huia's Blog', I thought it was a little more straightforward and less of a mouthful! My address, email and social media accounts will still remain averyhuiasblog though.

below is an image of January's header which is transparent, for a fresh new start!


here are the images of my business card,
                                 front                                                                         back


The process was fun & easy from my point of view, but it took it's time, and Rose worked really hard to make it perfect! We started by sharing the ideas in my head with Rose, and making a moodboard of colours, fonts and inspiration. After that, Rose had created a initial look, and I then found things that I liked and wanted to keep, and then things that I wanted to change, and she kept adjusting them until we had the final products!

The whole thing started in August, and is now finished, so it took a total of four months. I would highly recommend Rose, she did such a great job, and the images that I had in my head came out into the final product exactly, without us two talking, only emailing back and forth!

I hope you enjoy seeing what colours are for each months! I have tried to put the colours to months as the seasons are, so light and bright from summery, and slightly darker toned ones for winter! I have green for December, as it is a Christmas colour, and very summery!


lots of love, from avery huia x

instagram - @averyhuiasblog

Pin ThisShare on Tumblr

diy mood board! - Avery Huia

Saturday, 10 October 2015

helloooo there!


for today's diy post, I found the inspiration to do moodboard from instagram, which I am constantly finding amazing photos and projects on! it's pretty straight forward, but I thought that it would be fun for you to see the pictures and things that I used and I hope you get some inspiration from my one! I am so happy with how it turned out and when I look at it I get lots of ideas, from styling my room to colour schemes and fashion!


you will need:
+ frame (a4 or smaller)
+ scissors 
+ washi tape 
+ glue stick
+ magazines
+ 1 sheet pf a4 paper

start by leafing through the magazines and choosing a colour scheme or theme, and find pages and pictures which you think will match and go together. I chose a bright and colourful theme, with lots of different shades, but I still made sure that they all flowed.


with the backing of your frame, cut the a4 piece of paper to fit it if you need to. once you have found your photos and have cut them all out, place them on the piece of paper and arrange them until you have found a layout that suits you, making sure you have covered the white paper entirely. don't be afraid to overlap pictures and crop parts out of them to make room for other cut outs. 


once you have your perfect arrangement, remember to take a picture of it so you remember how it looks before you glue it all on! after I glued everything on, I added some washi tape on top of the pictures to make them look like they have been stuck on, and I thought that it gave a really cool pop of colour, and added texture to the mood board! 


here is my finished project! I am so happy with how it turned out, and it really gave my room a pop of colour and makes me feel good! I put some room decor and styling, some pillows and blankets, Emma Stone and Taylor Swift, some bold words, and A, H and a B, for Avery Huia's Blog, and some other pictures that I thought were really cool and pretty!

lots of love - avery huia x

email - averyhuiasblog@gmail.com

instagram - @averyhuiasblog


Pin ThisShare on Tumblr

new bed / room makeover / before and after - avery huia

Wednesday, 17 June 2015

hello!

okay, i know i have recently done a room tour, but that was kind of a before, and this is the after! in the last few days, i have changed my room heaps, for example i got a new queen bed  (omg!) , and changed my shelves, and got some new storage! here is my old room, and after you have read this post, you can compare with my old one!


my biggest and favourite change is my bed! i upsized from a single to a queen, and i love it so so so much. it is so comfy and i love the look of it compared to a single. the bedding is from aura home, the blue middle pillow from freedom, and the two euros and the little pillow in front, are both made by my mum. 


i am so happy that i finally changed the inside boxes in my shelves, and i really like looking at them now! i have put some little fake cacti in, a light up letter 'A', and lots of other little things in them.


i got some new boxes for the top of my shelving unit, and made some paper storage bags for my desk.


i decided to keep this area the same, but put the flowers in a mason jar.


i put a print from tales at sea next to my window, and stuck it up with some copper tape from kikki k.

i love my room so much, and i hope you got some inspiration or ideas from it!
lots of love - avery huia x

email - averyhuiasblog@gmail.com
instagram - @averyhuiasblog


Pin ThisShare on Tumblr
 

AVERY HUIA© Theme by Blog Milk