Powered by Blogger.

Fiji

Thursday, 27 October 2016


Hello there, I hope you've had a lovely day so far!

Finally I have finished my long awaited Fiji video! I filmed it all on my GoPro Hero+LCD and I used iMovie to edit it, I hope you enjoy it, I had the best time away, it was so much fun and I saw so many amazing things.


I hope you enjoyed,
love from avery huia x

Pin ThisShare on Tumblr

Easy Christmas Baking! - Avery Huia

Tuesday, 22 December 2015

helloooo!

as it is the time for christmas celebrations and parties, i thought that it would be fitting to do a post on some super yummy and easy recipes to share with friends and family or steal all for yourself! these two recipes are super christmassy and delicious!


the first one is white chocolate peppermint bark, and i have never tried this before, but it turned out great and would be a great last minute plate to take to a party!

you will need -
+ white chocolate baking buttons
+ candy canes

first, melt your chocolate in a microwave safe bowl or in a pan on the stove. I used the microwave, and melted the chocolate in lots of 20 seconds, then taking it out to stir, and put back in for another 20 minutes until it was smooth and a liquid consistency. I then put it in a baking tray, with baking paper inside it, and poured and smoothed it in.


you can then unwrap your candy canes, and start to break them up into little pieces, about a few centimetres long. put the little pieces in a plastic zip lock bag and then use something hard like a wooden spoon to crush them up into smaller pieces. once you have them at your preferred size, sprinkle them over the melted chocolate, and put in the fridge for an hour or so, until it is solid.

the next recipe is brownie christmas trees! these are supper yummy and look so cute! these take slightly longer to make than the peppermint bark, but look and taste even more amazing!

you will need -
+ brownie mix & additional wet ingredients (advised on mix packet)
+ candy canes
+ sprinkles
for icing -
+ a tiny bit of butter (on the tip of a spoon)
+ a few drops of water
+ 1 cup of sifted icing sugar
+ green food colouring


firstly, follow and make your brownie with he instructions that come on the packet mix. add the wet ingredients and bake for the suggested time. for the mix that I used, I added two large eggs, and 125g of butter and baked for 28 minutes (for an extra fudgy brownie).


once they are done, leave them to cool on a drying rack, and then cut the pieces into triangles (don't worry if they are uneven).  make the icing by mixing all of the ingredients until you get a wet consistency. then drizzle over the top of the brownies, in whatever shape you like, I did it randomly, but you can do it in a zig zag going down to make it more precise. after that, you can add sprinkles which will acts as baubles or decorations on the tree!


both of these treats are super cute and delicious! they are so easy to make, and would be great for parties! i hope you enjoy making and eating these! merry christmas and a happy new year, love from avery huia x


Pin ThisShare on Tumblr

my new look - avery huia

Sunday, 13 December 2015

helloooo, and surprise!

Incase you haven't noticed, I have a new blog banner, made with help from the lovely Rose, from Logic Design. I have twelve new headers, one new colour for each month! Rose has done such an amazing job, and everything has come out amazingly, and so unique. She also helped me put together some stunning business cards, I love these so much, they are so pretty!

I have also changed my title to 'Avery Huia' instead of 'Avery Huia's Blog', I thought it was a little more straightforward and less of a mouthful! My address, email and social media accounts will still remain averyhuiasblog though.

below is an image of January's header which is transparent, for a fresh new start!


here are the images of my business card,
                                 front                                                                         back


The process was fun & easy from my point of view, but it took it's time, and Rose worked really hard to make it perfect! We started by sharing the ideas in my head with Rose, and making a moodboard of colours, fonts and inspiration. After that, Rose had created a initial look, and I then found things that I liked and wanted to keep, and then things that I wanted to change, and she kept adjusting them until we had the final products!

The whole thing started in August, and is now finished, so it took a total of four months. I would highly recommend Rose, she did such a great job, and the images that I had in my head came out into the final product exactly, without us two talking, only emailing back and forth!

I hope you enjoy seeing what colours are for each months! I have tried to put the colours to months as the seasons are, so light and bright from summery, and slightly darker toned ones for winter! I have green for December, as it is a Christmas colour, and very summery!


lots of love, from avery huia x

instagram - @averyhuiasblog

Pin ThisShare on Tumblr

Christmas Room Decor - Avery Huia

Thursday, 19 November 2015

helloooo!

for todays post, I thought that I would do Christmas room decor! I have 3 things that you can buy, and 2 things that you can make. I am so excited for Christmas and I have used all of these to make my room super festive!


I got this silver bell star wreath, and I thought it looked so cute and added a simple festive touch, but it could also be used all year round. I got this from Kmart, and it was super cheap!


I added some candy canes in a mason jar, and they add a touch of red to my room, but they are super hard to resist! You can get these anywhere, and there are some super cute DIYs with candy canes, like a heart shaped wreath!


Also at Kmart, I found this super cute pillow with a gold reindeer on it! This adds a festive touch, and a pop of gold too! It is also reversible, and on the other side it has gold, sliver and black triangles!


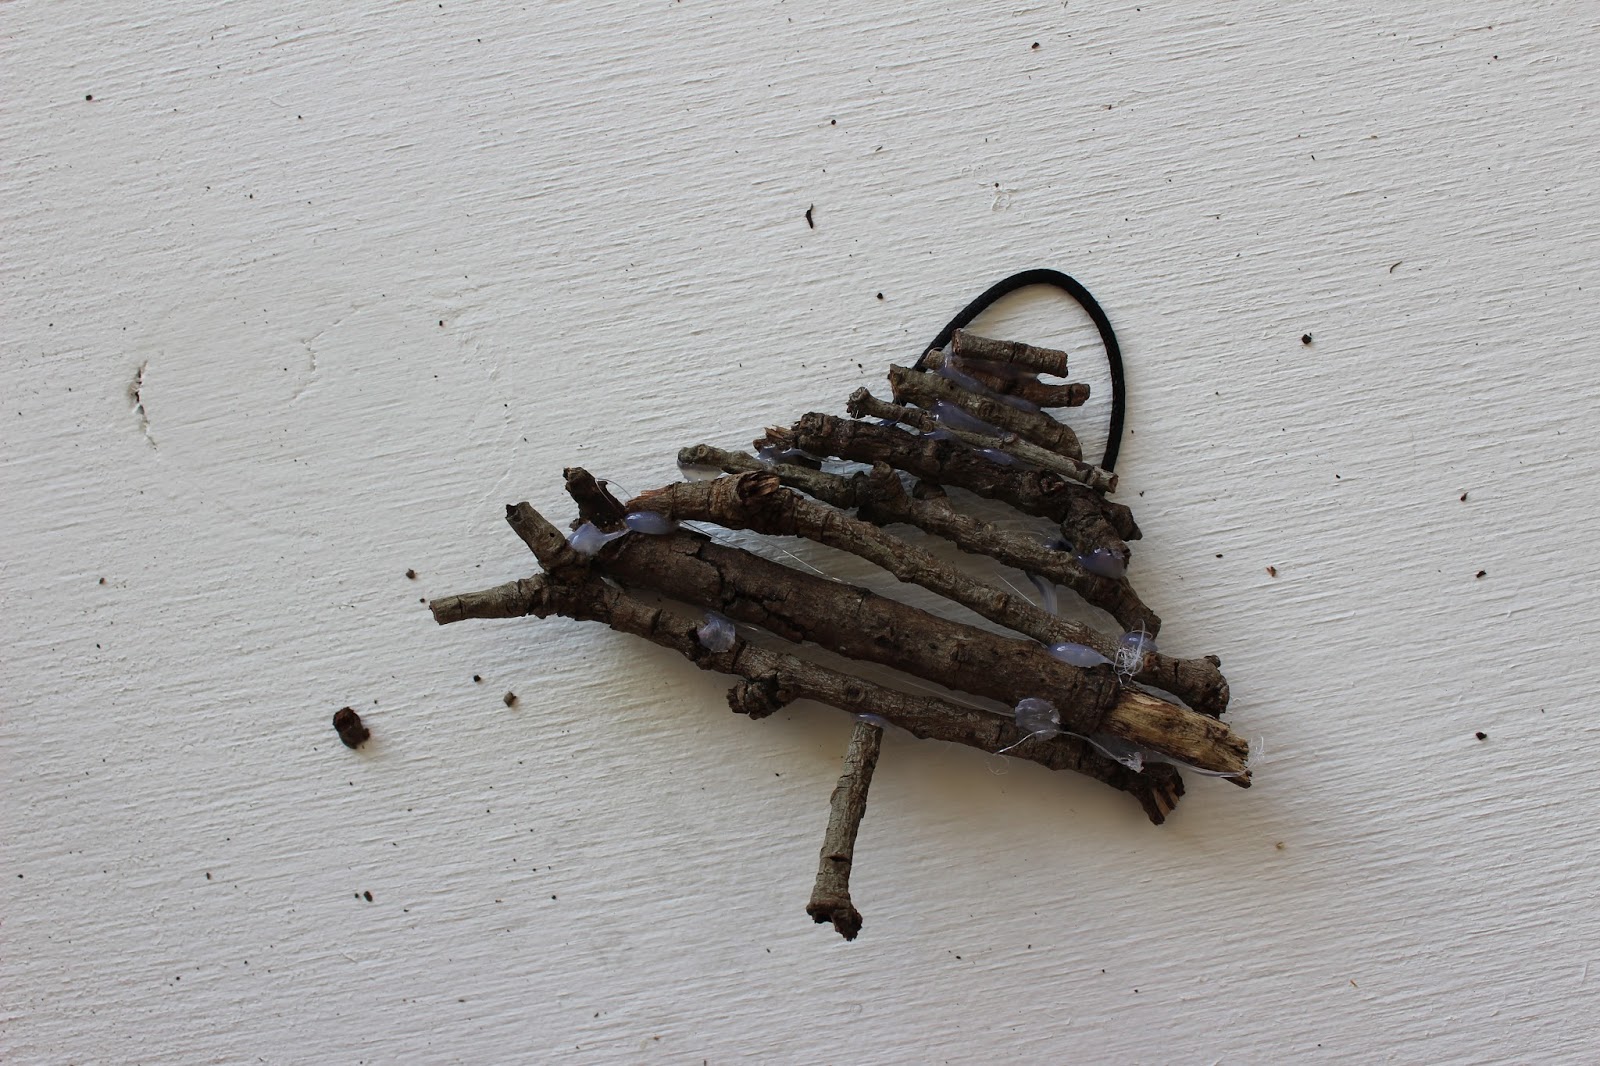
for this DIY, we will be making some christmas tree ornaments, out of sticks! You will need -
- sticks of any shape and size
- hot glue gun 
- thin ribbon/wire
- strong scissors 
First, start cutting up you sticks so that they form a Christmas Tree sort of shape, and trim them to the size that you want. You could make a wall hanging out of this, or do what I did and just make little ornaments to hang on the tree, though I hung these in my room. Once you have your desired shape, glue away! Then cut a piece of string or wire on to the back in a loop shape to hook it onto things. Now you have a super cute and festive decoration for your room!


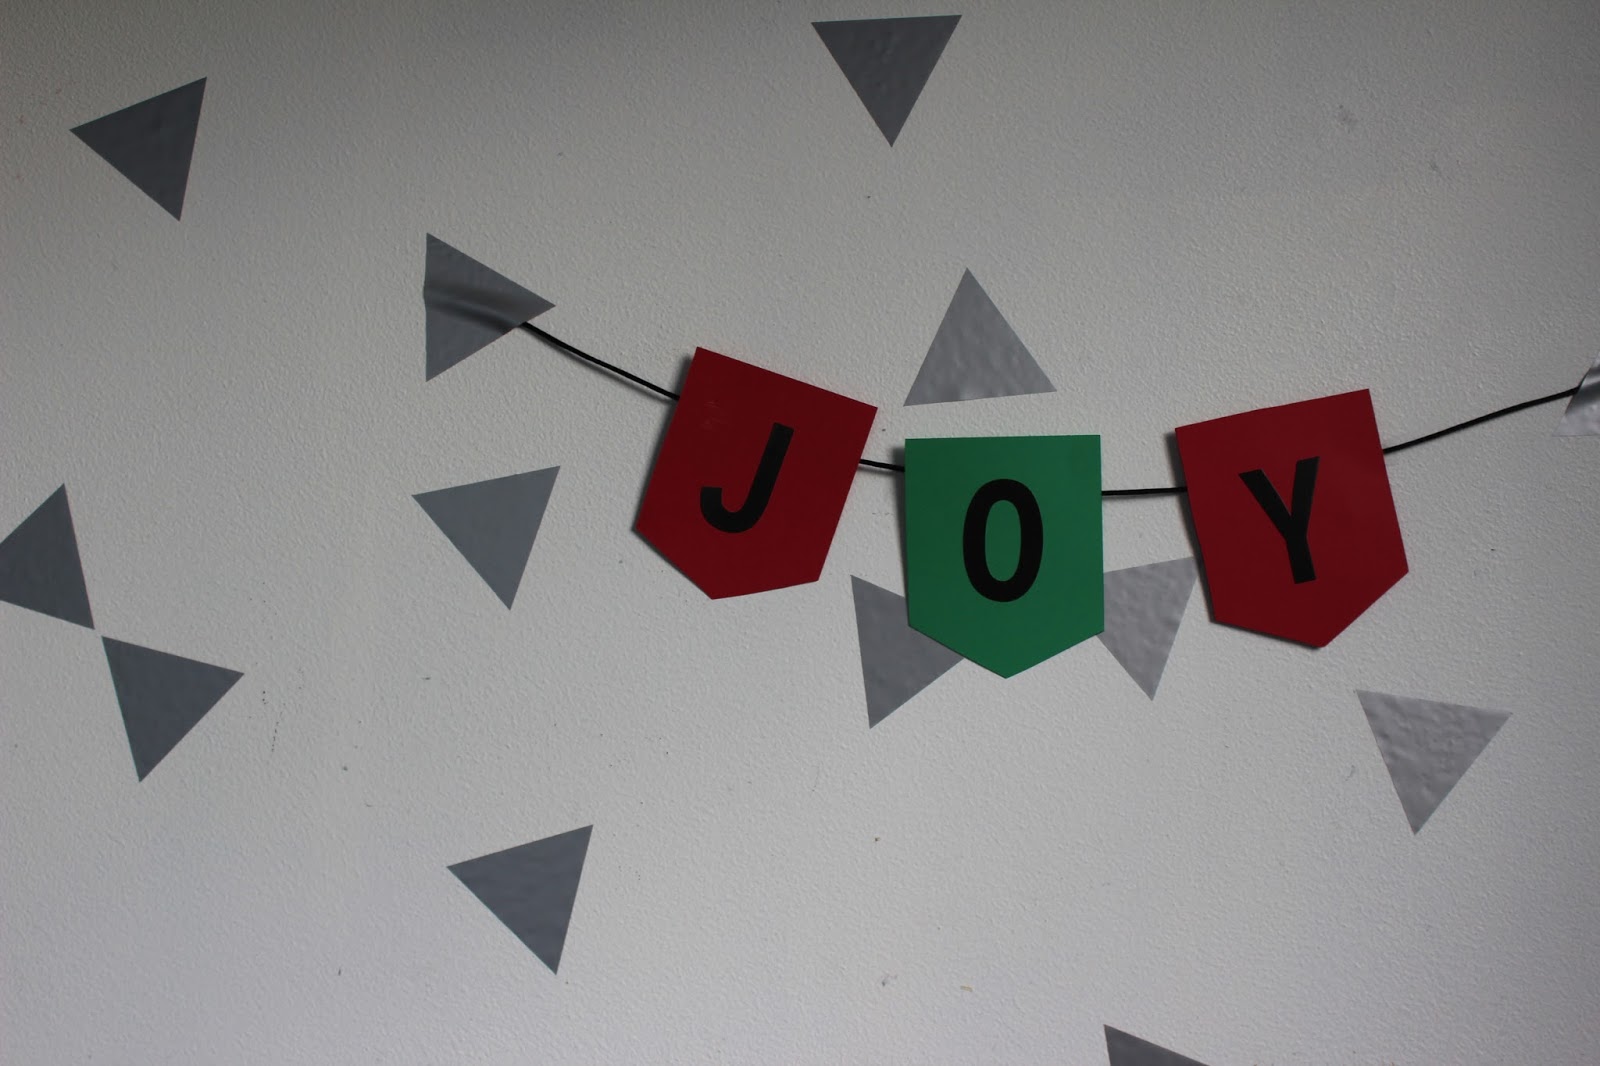
For this bunting DIY, you will need
- big letter stickers
- red and green card paper
- ribbon/string
- ruler and scissors, pen and sellotape

First, measure out the size of bunting that you want, I did mine roughly 8cm across and down, but put a further 2cm down for the point at the bottom. Do this in repeating colours (red & green) until you have enough for your chosen word (mine was joy). After that, stick the letters on, and tape the letters to the string! Then you can hang it up in your room or around your house to get you in the mood for Christmas! Here is a closer shot of the final look!


I hope you enjoyed this and got some ideas on how to festive-ify your room for the holidays! I can't wait for the rest of my Christmas Series, I have some super exciting posts planned!

love from avery huia x


email - averyhuiasblog@gmail.com

instagram - @averyhuiasblog


Pin ThisShare on Tumblr

Firework Photography - Avery Huia

Saturday, 7 November 2015

helloooo!

sorry about the late post, but I was waiting until Guy Fawkes night to take some cool pictures for this weeks post (there will still be a post on Tuesday!). We had an amazing night and I captured some really cool shots that I hope you enjoy!

We had some friends over for the night and had small platters and nibbles to eat and it was a really fun night topped off with fireworks when it got dark.


above- my dog clover who was a little bit scared :(


above - my personal favourite!


I hope you enjoyed! Fireworks are so much fun and a great photo subject :) 

love from avery huia x 

email - averyhuiasblog@gmail.com

business and advertising opportunities are now accepted :)

Pin ThisShare on Tumblr

summer lookbook - Avery Huia

Tuesday, 27 October 2015

helloooo!

In NZ we are finally heading into some warmer weather,  and I am so excited for summer fashion! I love the style, colours and how easy it is to pop on an outfit after the beach or before going to the beach with togs on underneath! I have put together four outfits that I will definitely be wearing this summer!


the first outfit is for slightly cooler nights, and I have paired these white jeans (here) from Glasssons with one of my favourite tops (which is no longer available :( ) from Huffer. I love this combination and I think it would be perfect for a dinner out or and evening event. 


this dress is from RPM, you can find it here and I love it so so much. The colours are not too dark, and the material is really nice and lightweight, and the cut is perfect. This would be great for Christmas Day, any family events or a party! 


this is more of a casual day outfit, and if you have seen my latest key item post (here) where I talk about stripes and denim, you would know that I love the combination. It is very casual and versatile, and I love how simple it is! My top and shorts are both from Glassons, you can find them here, and here. 


this playsuit is definitely going to be my go to beach cover up, and I love the colours and pattern of it! It goes with nearly all of my shoes, and can easily be dressed up or down. It is from Rusty, (which is also no longer available)  and it is one of my favourite summer pieces. 


all of these items are stunning, and I recommend all of them! I hope you got some inspiration from this, and if you are in the northern hemisphere and going into winter, take a look at my winter fashion post (here)


love from avery huia x 

email - averyhuiasblog@gmail.com

instragram - @averyhuiasblog

------

advertising opportunities now available! find the email listed above for further information and contact inquiries. 


Pin ThisShare on Tumblr

5 Ways to Stay Organised for School - Avery Huia

Monday, 19 October 2015

helloooo!

In New Zealand, as we are heading into Term 4, where most tests and exams are held, we need to stay organised, and I have come up with 5 ways of how to do that! I am not going into any major exams at the moment, as I am only year 9, but we do have a lot of end of topic tests and end of year tests. 


1 - Something that I find really helpful is a planner/diary. This is really good because you can see al of your notes, upcoming tests and assignments all in one place. It is super helpful and you can decorate them to be really cute and it helps to motivate you!


2 - Use flashcards when revising for tests. I have recently got a pack of ones that you write on yourself and they are so helpful when revising for tests because it is an easy and portable way to test yourself on the go.


3 - When taking notes in class, make sure to keep them bright and colourful, and even colour coded! It is so much easier to read when they are bold and the key words


really pop and stick in your head when studying. Colour coding really helps you to know where the important notes and words are.

4 - Make to do lists. These are super helpful so you know what you have to do, how urgent they are and it makes it really bold and it isn’t hard to forget what you need to do. 

5 - Tidy up your study area. It is really important to have a clean study area where you can see all of your notes and it is not clogged up with unnecessary items and other schoolwork. It helps me to focus a lot more when my workspace is tidy and organised. 


I hope you enjoyed this! I find all of these tips really helpful when I am preparing for tests or studying. Good Luck for any upcoming exams, you can do it! 

love from avery huia x

email - averyhuiasblog@hotmail.com

instagram - @averyhuiablog

Pin ThisShare on Tumblr

diy mood board! - Avery Huia

Saturday, 10 October 2015

helloooo there!


for today's diy post, I found the inspiration to do moodboard from instagram, which I am constantly finding amazing photos and projects on! it's pretty straight forward, but I thought that it would be fun for you to see the pictures and things that I used and I hope you get some inspiration from my one! I am so happy with how it turned out and when I look at it I get lots of ideas, from styling my room to colour schemes and fashion!


you will need:
+ frame (a4 or smaller)
+ scissors 
+ washi tape 
+ glue stick
+ magazines
+ 1 sheet pf a4 paper

start by leafing through the magazines and choosing a colour scheme or theme, and find pages and pictures which you think will match and go together. I chose a bright and colourful theme, with lots of different shades, but I still made sure that they all flowed.


with the backing of your frame, cut the a4 piece of paper to fit it if you need to. once you have found your photos and have cut them all out, place them on the piece of paper and arrange them until you have found a layout that suits you, making sure you have covered the white paper entirely. don't be afraid to overlap pictures and crop parts out of them to make room for other cut outs. 


once you have your perfect arrangement, remember to take a picture of it so you remember how it looks before you glue it all on! after I glued everything on, I added some washi tape on top of the pictures to make them look like they have been stuck on, and I thought that it gave a really cool pop of colour, and added texture to the mood board! 


here is my finished project! I am so happy with how it turned out, and it really gave my room a pop of colour and makes me feel good! I put some room decor and styling, some pillows and blankets, Emma Stone and Taylor Swift, some bold words, and A, H and a B, for Avery Huia's Blog, and some other pictures that I thought were really cool and pretty!

lots of love - avery huia x

email - averyhuiasblog@gmail.com

instagram - @averyhuiasblog


Pin ThisShare on Tumblr

South Island Adventure - Avery Huia

Saturday, 3 October 2015

hellooo!

if you follow my instagram, (@averyhuiasblog ;) ) you would know that during the past week, I have been travelling the South Island of New Zealand! I had such an amazing trip, and I took lots of photos of the incredible places, and I am going to share them with you in a photography post.


My mum and I flew down to Wellington, which is a the bottom of the North Island, to go and watch the World Of Wearable Arts show. We stayed there for one night and then flew down to Christchurch to meet my brother and my dad, and to pick up our camper van. We stayed in Christchurch for 2 nights, and then drove down to Lake Tekapo for one night, before driving down to Alexandra, to stay for one night. After Alexandra, we drove to Queenstown and stayed there for two nights. You can see our full journey on the map below!


3 above - christchurch botanical gardens

 
christchurch catholic cathedral


lake tekapo


4 above - view from the top of Mt. John observatory


lake tekapo


mount cook - the tallest mountain in new zealand


view of mount cook from a lookout 


2 above - lindis pass, on the way to alexandra


cherry blossoms in alexandra 


arrowtown (sneaky lolly shop bags)


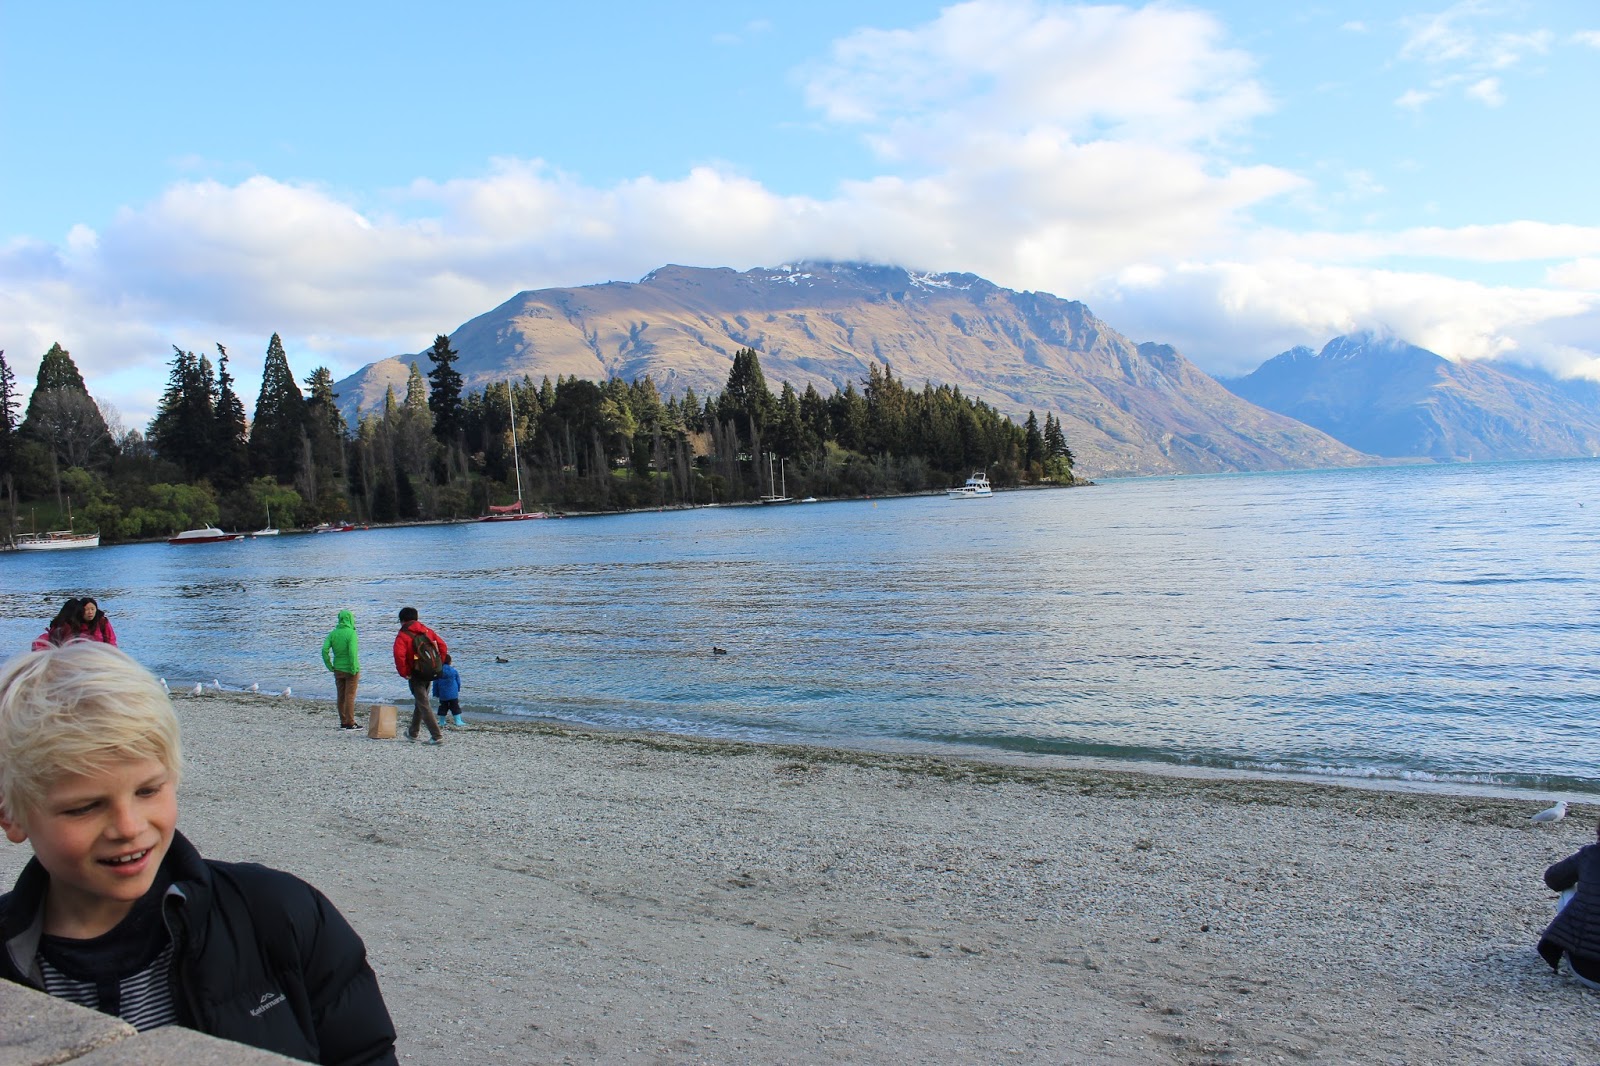
2 above - my brother and I in Queenstown/Lake Wakatipu 


view from the plane on the way back to auckland! 

I loved this trip so much, and it was so so so much fun! Every place we went to was amazing, and it was such an amazing experience! I loved Queenstown especially because of the attractions, like the Luge and Skyline/Gondola, and also the Shooter Jet boat ride! I hope you enjoyed this post, as it was kind of different to what I usually do. 

love from avery huia x

email - averyhuiasblog@gmail.com

instagram - @averyhuiasblog


Pin ThisShare on Tumblr
 

AVERY HUIA© Theme by Blog Milk